Install
The following is the installation guide for the Wolt Drive for WooCommerce plugin, the premium integration of Wolt Drive services with WooCommerce.
Prerequisites
Wolt Drive is tested with and assumed only to work with the following software versions:
- PHP - version 8.1 or higher
- WordPress - version 6.6 or higher
- WooCommerce - version 8.0 or higher (tested at 9.1)
Installation
-
Download the archive file.
After your purchase, you should have received an email containing a download link.
-
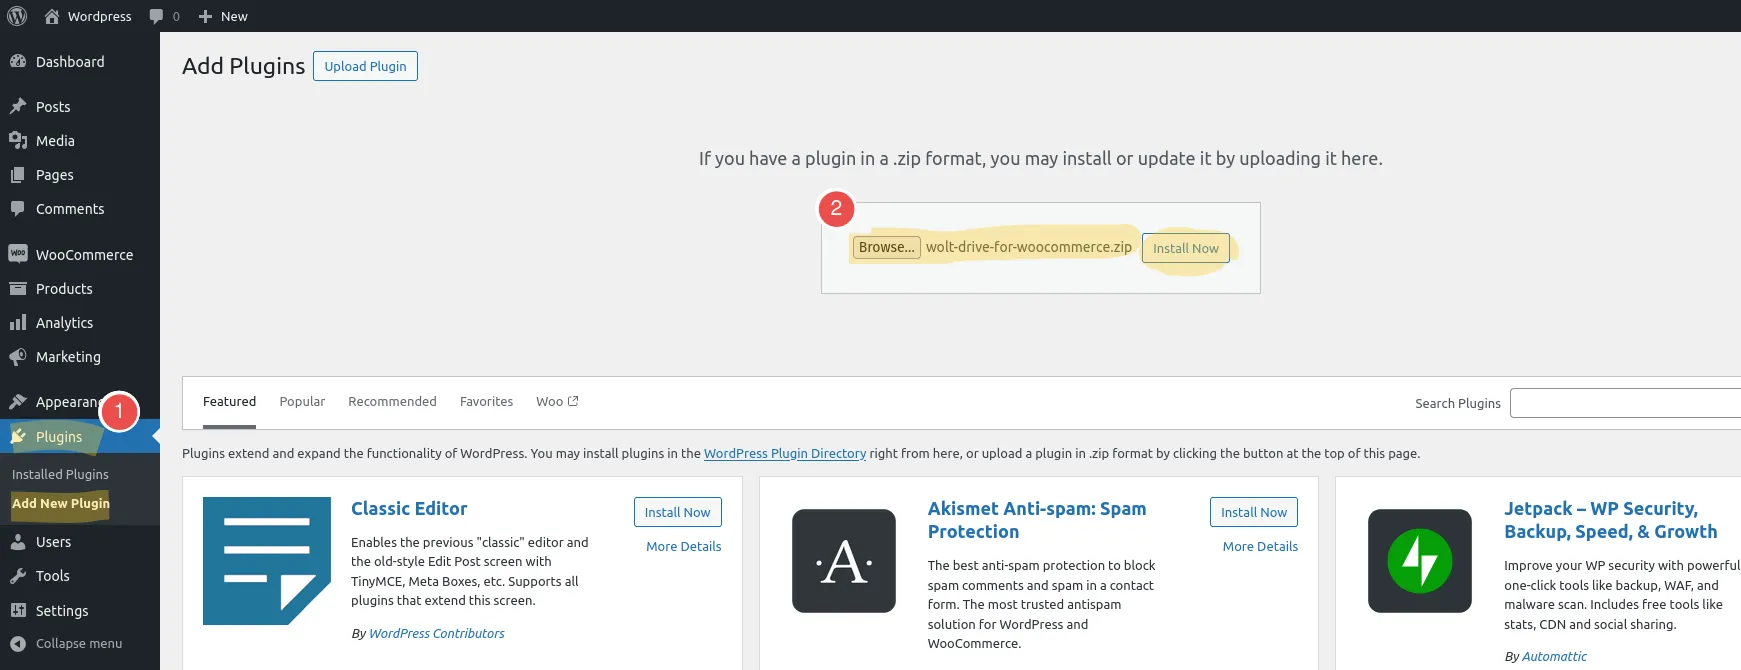
Upload the archive to your WordPress installation, using the WordPress installer.
- Navigate to Plugins / Add New Plugin.
- Press “Upload Plugin”
- Press “Browse” or Drag and Drop the archive to the box.
- Press “Install Now”
Configuration
Manual configuration is required before you start using the plugin. The global settings page is available from:
- The Installed Plugins table, by clicking the “Settings” link on the Wolt Drive for WooCommerce plugin row.
- The WooCommerce Settings page, under the “Wolt Drive” tab.
Global settings
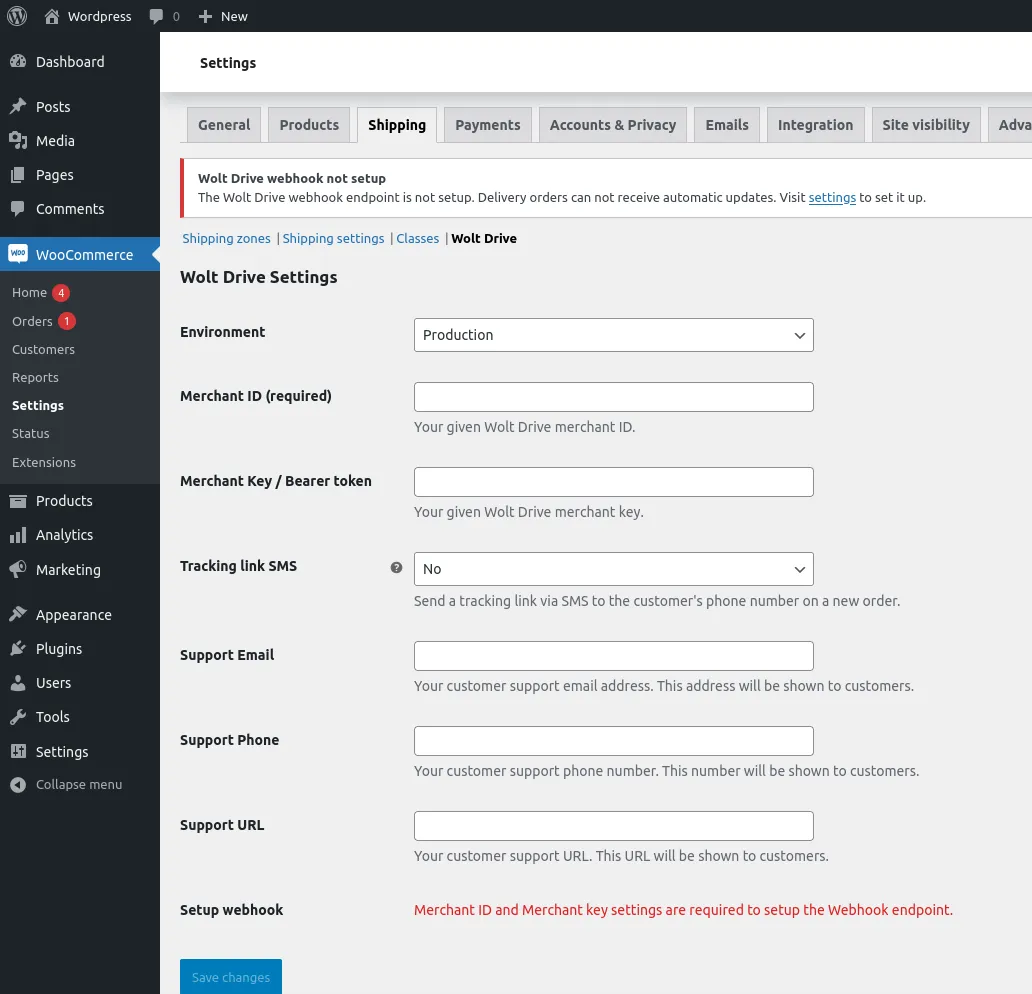
To use Wolt Drive, fill in the global settings options.
- Environment - Development or Production. Use the Development environment for testing purposes.
- Merchant ID and Key - The Merchant ID and the Merchant Key (Bearer Token) should have been provided by your Wolt Drive contact person.
- Support Email/Phone/URL - The support email, phone and URL are the support info the customer will see on the Wolt order tracking page.
- Wolt Courier Tips - Yes or No. Shows courier tip buttons on the checkout page.
- Global Mode - Enabled or Disabled, global mode allows creating Wolt Drive orders even when a Wolt Drive shipping method is not available for an order.
Press Save changes.
Setting up the Webhook
The Webhook is used for automatically updating Wolt Drive delivery order info.
Once the settings are saved, and only if the merchant credentials are filled in, the Setup webhook option will be enabled and should be prompting you to Create the webhook.
Press Create webhook to set up the webhook.
The configuration is now complete. Now, the next step is to set up the Wolt Drive shipping method.
Global Mode New

The Global Mode option allows Wolt Drive orders to be created using a global venue address. With this on, the customer may select a shipping method that is not of “Wolt Drive”, and the shop manager may create Wolt Drive orders for those orders.
A Wolt Drive order will only be available to created when the shipping address is inside the supported delivery area.